Tuesday, December 24, 2013

Garage and Shed Wall Storage

So, this is not a specific wood working project - and more of a DIY project - but it helps me move forward in getting my garage shop cleaned up and functional.

I bought a ProSlat Slatwall Organizer from woot.com a few weeks back and my dad assisted with the install.

We broke it into two parts - followed the directions for a smaller install in my garage to hang my ladders on. The main change is we used only two slats rather then the full number.  This is the results:


Works well, definitely better than the plywood and lag-screw style hangers I had before.

Last summer I installed a Rubber Maid resin shed in my back yard. These sheds have built in pockets and U shaped hangers that allow folks to hang peg-board or other systems. Unfortunately, Slatwall is frame-less. So I had to improvise with material I had around the house.  I had some 4" pine stock left over from a couple of projects ago, so I figured out that if I built a 33" high by 48" wide frame I could have 6 slat sections. The height was dictated by the location of the built in hanging pockets Rubber Maid provided.


Time to cut some lumber to size. I made two 48" long and three 26 1/4" long pieces.


Next up was joinery. I have a Kreg pocket hole jig and screws - and to me, this is the easiest, fastest way to build this frame.


I needed to attach the hangers via some bolts, so I did a little extra layout to make sure the bolt heads line up in a channel of the ProSlat.


After the hangers were attached, I hung the frame in the shed.  The stock I used was a little warped; so it doesn't hang flat - but it will do everything I need it to do. You can see the first piece of the ProSlat installed below.


I then followed the installation instructions and installed the six slats and top trim.  A couple of hooks later and we are looking pretty good.


Next time Woot has a hanger kit, I will probably pick one up. The single hooks are OK- but some better hooks will make the organization much easier.

Part of doing the project required me to clear out more space in my garage. I bought materials to build a workbench, so expect pictures from that project soon.

Sunday, February 17, 2013

Router Table - Part 4

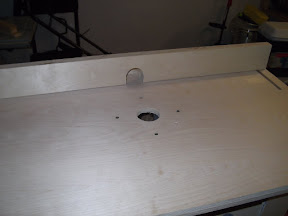
This is the final part of my router table setup. All of the wood parts are in place, and now it is time to mount a router.  See Part 1, Part 2, and Part 3 to catch up.

First step is router selection. My shop router is a Sears Craftsman combo kit (fixed and plunge bases) and it is perfectly functional. But I did not want to have to swap out router bases whenever I wanted to swap projects. This means I need a dedicated router for this table.  I spent a bunch of time researching and finially decided on a Bosch 2-1/4 HP Variable-Speed Router. With Amazon Prime, I got it delivered in two days.

This particular router is setup to handle being mounted in a cabinet and the adjustment knob can be adjusted from the underside with a small wrench (included).

First step was drill four holes in my router table-top. This will allow me to use the included machine screws to attach the router to the top.

From Router Table

Note the adjustment hole has not been drilled. My cordness ran out of juice before I could drill that one.

Next up I did the test fit of the base. It will have to be removed because I have to drill that adjustment hole.

From Router Table

Here is a top view showing the recessed machine screws. The pencil circle is where the adjustment hole will go.

From Router Table

After my drill's batteries charged, I could drill that final hole and permanent mount the router base.

From Router Table

This is how I will make fine adjustments from the table top.

From Router Table

Here is the router in the base with a straight cutting bit installed.

From Router Table

And here is my first test pass.  That is just a scrap piece of pine I had in the garage, but I am pleased with how well it worked.

From Router Table
There are only a couple of adjustments I am going to make and none are required. For one - I am going to add a couple of handles to the cabinet base. It is tricky to move around  as it sits.  I am also going to figure out the power. Either by installing a switch that controls both the router and a vacume or by figuring out how to route the power cable out the side or back of the cabinet.

I hope these posts have been helpful and gives some ideas to others looking to build a router table for themselves.